- Getting Started with All American Sterilizers
- Beginner’s Guide to Growing Mushrooms in Buckets
- Start making your own Mycelium Objects
- Learn about Mushroom Grains
- All about Heat Sealer
- Beginner Mushroom Growing Kits
- Agar Plates
- Learn about Different Mushrooms
- Grow Mushrooms on Logs
- Mushroom Liquid Culture
Complete Guide to Grow Mushrooms in Buckets
Introduction
You can easily grow mushrooms at home using buckets, especially if you are using less nutritious substrates and varieties that don’t require complex nutrition for sustenance.
Straw and sugarcane mulch are the most commonly used because you can easily pasteurize them by treating them with cold water and Calcium hydroxide. If you want to boost your yield significantly, add at least 25% sawdust spawn into the mix. Although grain spawn is effective, certain species like Brown and Ivory Shimeji and Oysters—which have a preference for wood—yield better when sawdust spawn is used.
The varieties that can be grown using this method are- Yellow Oyster, Blue Pearl Oyster, Pearl Giant Oyster, Pink Oyster, Tan Oyster, Phoenix Oyster, Winter White oyster, Warm white Oyster, Black king oyster, King of Pearl oyster, Princess of Pearl Oyster, Ivory Shimeji, Brown Shimeji.
Supplies Needed:
- Bucket: 20 L food-grade bucket. You can purchase a second-hand one from Facebook Market or a new one from Bunnings.
- Drill: For making holes in the bucket. Drill 5-6mm holes. Don’t make the holes too big.
- Substrate: Wheat Straw or sugarcane mulch.
- Mushroom Spawn: Purchase a spawn of your chosen mushroom variety. Spawn could be sawdust or grain spawn. Sawdust spawn increases yield for wood-loving varieties.
- Water: For soaking and misting.
- Calcium Hydroxide: For pasteurizing the substrate.
- Micropore Tape: To cover the holes and maintain humidity.
- Plastic Sheeting or Bags: To cover the bucket and maintain humidity.
Procedure:
1. Prepare the Substrate: • If you are using straw, cut it into short lengths of about 1-2 inches long. Pasteurize the substrate to eliminate any competing organisms. This can be achieved by soaking it for hours in water mixed with 5 grams of calcium hydroxide per litre of water. Evidently, upon adding calcium hydroxide to water, the pH level rises, and a pH strip immediately will display a reading of 14, and then it will subside to 7 over 24-48 hrs. Submerge the straw for up to 3-4 days, then remove it and let it drain. The submerging will cause fermentation, which will make the mycelium easily digest the straw and fruit quickly.
2. Inoculate the Substrate: Once you have appropriately pasteurized and drained the substrate, mix it thoroughly with the spawn at a 10-25% ratio. Pack the inoculated substrate into the bucket, making sure it’s firm but not overly compacted. Cover all the holes with micropore tape.


3. Inoculation: Place the bucket with the lid overtop and place somewhere warm and dark, so the mycelium can colonize the substrate. This usually takes between 2-4 weeks. You may check on it periodically by opening the lid to ensure it is colonizing well and no contamination is growing inside.

4. Fruiting: Once the substrate is fully colonized, move the bucket to a cooler, well-ventilated area with indirect light. You’ll know it’s time to fruit when baby clusters of mushrooms push through the micropore tape. Keep the bucket in a humid environment. Do not mist the baby mushroom directly.
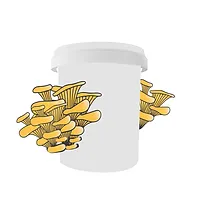
5. Harvesting: Harvest the mushrooms once they have fully grown, which is usually just before their caps completely uncurl. Gently twist and pull the mushrooms to harvest them without damaging the mycelium. Cover the holes with tape again and leave the bucket for a second flush, which generally occurs after 7-10 days.
6. Maintain and Repeat: You may get several flushes of mushrooms from a single bucket before the substrate is spent. You may use spent substrate in your compost pile or as a mulch in your garden.
Following these steps will help you grow mushrooms in a bucket at home successfully. Remember that different mushroom varieties may have slightly different growing requirements, so it’s advisable to research the specific needs of the mushroom variety you wish to grow.
Table of Contents
How useful was this post?
Click on a star to rate it!
Average rating 4.9 / 5. Vote count: 108
No votes so far! Be the first to rate this post.
Get Exclusive Updates - Subscribe Now!
Join our community and stay in the know! Subscribe to our newsletter for exclusive insights, first access to new content, special offers, and industry trends. Don’t miss out—sign up today!
Owner of Rootlab


